The Canon Pixma TS8320 ($129) is a compact, inkjet all-in-one that is best suited for photo-printing enthusiasts. It has an SD card slot on its front panel, can print on specially coated CD/DVD discs and offers two paper trays so you can keep plain as well as photo paper loaded.
Most important for photographers, the TS8320 is outfitted with six individual ink cartridges, offering the possibility of a wider color gamut in photo prints by employing a photo blue ink cartridge in addition to two black inks and the traditional cyan, magenta and yellow.
The TS8320 comes in black, white and red, and offers some fun features aimed at smart home enthusiasts: support for Google Assistant, Amazon Alexa and IFTTT (If This Then That).
Design
With its paper trays retracted and the touch-screen control panel folded down against the body, the TS8320 is very compact, measuring roughly 14.6 x 12.5 x 5.5 inches. However, the depth increases to 14 inches when you extend the paper cassette beneath the body to hold letter-size paper. The rear input tray significantly increases the depth; it angles backward when lifted for use, making the total depth about 25 inches. The rear paper tray also increases the height to roughly 11.5 inches.
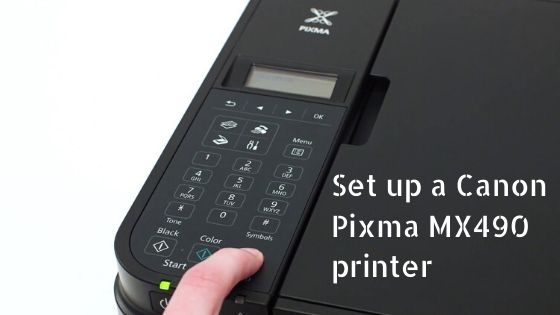
To operate the TS8320, you use the large, 4.3-inch color touch screen, which makes a big first impression and worked well in our testing. There are not any physical buttons on the control panel other than the power button. The big touch screen offers large virtual buttons for the three main functions (copy, scan and print) and smaller icons along the bottom for making changes to settings. We found the menus well organized and intuitive to navigate.
The SD card slot is on the front panel, at the bottom left next to the paper cassette. This allows you to print photos directly from a camera's memory card, without having to plug it into a PC. There is no USB Direct print port for printing files from a thumb drive.
"To operate the TS8320, you use the large, 4.3-inch color touch screen, which makes a big first impression and worked well in our testing."
Print speed
Text printing was roughly average in speed. The TS8320 printed our five-page test document in 34.4 seconds, or 8.7 pages per minute (ppm), versus the category average of 9 ppm for comparable models. The Editor's Choice Canon Pixma TS9120 printed the same document in just under 27 seconds (11.2 ppm).
Our six-page, mixed-text and graphics PDF printed more quickly that average, arriving in 1 minute and 52 seconds, or 3.5 ppm, versus the average of 2 minutes and 14 seconds, or 2.7 ppm.
Photo printing was impressively fast. Our letter-size, high-resolution glossy print emerged in 2 minutes and 2 seconds — less than half the average time of 4 minutes and 15 seconds. The Canon TS9120 was similarly fast, printing the photo 5 seconds faster than the TS8320. The Epson Expression XP-640 was slower, taking 2 minutes and 33 seconds.
Copy and scan speed

The TS8320 made a color copy in 23 seconds, which was faster than the category average of 27.7 seconds. By comparison, the TS9120 made a color copy in 17.3 seconds; but the fastest model to date, the HP OfficeJet Pro 9025, made a color copy in just 12.5 seconds.
The TS8320 made black-and-white copies at roughly average speed, making a copy in 14.6 seconds, compared with the category average of 15.8 seconds. (The fastest model on this test is the HP OfficeJet Pro 9025, at 8.7 seconds.)
Print quality
Text prints from the TS8320 looked good, but not great. Letterforms looked adequately dark, but up-close edges looked somewhat bumpy.
Graphics looked more impressive, printing with well-saturated, natural-looking colors and accurate contrast. Details looked sharp and midtone transitions looked smooth. Some very mild banding was evident in flat areas, as were the borders of text boxes in our test PDF. Duplex prints looked just as good as single-sided prints.
Glossy photos had plenty of detail and accurate textures. I liked the prints I got on glossy and matte papers. Colors looked well saturated and very natural. There were differences, however, compared with glossy prints from the Epson XP-640, for example: Our test portrait's light complexion looked "cooler" and was not "warmed up" like the Epson's, with reds and yellows more saturated in the skin tone.
Ink cost and yield

The TS8320 uses six ink cartridges: a pigment black (primarily for text), a dye-based black (primarily for graphics) and four dye-based colors (cyan, magenta, yellow and photo blue). Three capacities of ink cartridges are offered: standard and two levels of high yield (XL and XXL).
Overall, according to our calculations, the TS8320's ink costs are higher than the average for comparable inkjet printers we've tested. For the following costs, we calculated using the cost of individual ink cartridges.
Using standard cartridges, the TS8320 offers costs per page of 9.5 cents and 23.6 cents for text and graphics, respectively, versus the averages of 7 cents for text and 19.6 cents for graphics. By comparison, the Epson XP-640 has lower-than-average costs per page of 5.8 cents and 18.8 cents, respectively.
Setup and software
Basic setup of the TS8320 was straightforward. You remove half a dozen pieces of orange shipping tape and some cellophane. Plug in the printer, turn it on and select your language on the touch screen, which then walks you through the ink cartridge installation, showing a graphic of each cartridge as you install it.
Although a CD-ROM comes in the box, the printed start guide's large print instructs you to go online (ij.start.canon>setup>go>start) to download the software. (The CD-ROM setup is covered at the bottom of the page, in small print.)
The software download includes the printer driver, scan utility (Win/Mac) and a Scan Utility Lite option for Macs. The online download, however, did not include the Easy-PhotoPrint Editor application. I had to find that myself on the TS8320's Drivers & Downloads page. The same was true of the online software installation I ran for a Mac running OS 10.12 (Sierra). Easy-PhotoPrint Editor is used to create and print collages, calendars, cards, stickers and CD/DVD disc labels.
Read more in detail: tomsquide


